Showing posts with label Baked Goods. Show all posts

Wednesday, November 26, 2014

Book Review: Blue Ribbon Baking from a Redneck Kitchen by Francine Bryson


As you can probably tell by now, I have a great love for cookbooks and Blogging for Books (thank you!) keeps me in supply.

This time around, I chose an unlikely book for me in some ways because a traditional Southern kitchen is bound to be loaded with butter, milk, cream (hint: dairy products), flour and wheat derivatives, and all sorts of Crisco, something I tend to not use. However, in the spirit of my sister who lives with her beautiful family in the deep South, I chose this book, Blue Ribbon Baking from a Redneck Kitchen by Francine Bryson.

Turtle Cake Roll
I watched about half of the inaugural (and only, I think) season of American Baking Competition, hosted by Jeff Foxworthy and a hefty panel of baking judges, including the famed Paul Hollywood. I distinctly remember Francine Bryson from the show. Her personality was as big as her apparently-amazing baking skills. She just shone bright and she was willing to take a risk without compromising herself or trying to tear someone else down - outside of just plain fun. I appreciated that in a contestant on a reality cooking show. There's always one who is bound to make you shake your head at their antics and Francine was not that one. She was strong, vocal, funny, and clearly, talented. She landed in the top three and impressed everyone.

And now, she has a new cookbook, right from her self-titled redneck kitchen.

The book is a really wonderful compilation of new and old recipes, either passed down to her from one of her grandmas, something she created due to a baking competition, or just to please her family. Francine is a skilled baking competitor. She started baking at a very young age with her grandmas (both lived right near her for most of her youth), then went on to experiment on her own. She started entering into baking competitions in her teens and, to her astonishment, won. She began collecting recipes and cookbooks, amassing a mere 3,000 books in all. (I would love to see her library or kitchen, wherever she has them stored.) And from all her years of competitive baking, she began to truly hone her skills and learn the ins and outs of true baking...under pressure.

World Famous Chocolate Bacon Peanut Butter Pie

As I pawed through her book, the first thing I noticed was the ease in which it was written. Each recipe starts with a story about Francine, where the recipe came from, or simply the love of baking that particular thing. There are lots of mentions of Granny, Nana, and Mama, her mentors in the world of baking; plenty of nods to her hubby and how she won his heart with her baking; and many stories about why she loves to bake. Her passion is clear and evident and so is her skill. Many of the recipes include a Blue Ribbon Tip about how to make each recipe come out just right and there are eight different pie crust recipes - and that's just for a start. There is plenty of wisdom for new bakers or experienced bakers wanting to tap into her many years of baking knowledge and prowess that comes from twenty-some years of competitive baking, which requires a whole other level of expertise and creativity. No ordinary cherry pie is going to cut it, not unless it knocks your socks off.


Francine's book is filled with pie recipes, cake and cookie options, cheesecakes, candies, and other assorted dessert treats. Some are simplistic and others have a twist that make them intriguing and clever. There are too many recipes in the book to mention that aroused intrigue (of which I spent 20 minutes describing in detail to a friend on the phone just awhile ago). So, I will mention two: Blue Ribbon Pumpkin Cake and Upside-Down Apple-Pecan Pie. Holy moly. These two are something out of this world. Both won competitions and by the looks of them, I can see why, if not for just looks and creative design alone.

The Blue Ribbon Pumpkin Cake is a four-layer moist pumpkin cake with a sweet cream cheese frosting and chocolate glaze, however, there is an interesting twist to this cake. A couple of interesting twists, in fact. One is that she uses lemon-flavored Greek yogurt in the cake batter. Fantastic. The other, however, is truly where the magic lies. In between the cake and frosting layers, she has added a layer called cookie crunch. She starts with butter, Oreos, a can of salted mixed nuts and some brown sugar, adds them to the food processor, then pulses. She layers this into four 9-inch buttered pans, then adds the pumpkin cake batter on top and bakes it. The result is this beautiful four/eight layer confectionary cake that is truly outstanding just to look at. I can only imagine how delicious it tastes. I might just have to try it one of these days. Part of what I love about her book is I'm pretty sure I can adapt just about any of her recipes. This one, for sure.

Blue Ribbon Pumpkin Cake

The Upside-Down Apple-Pecan Pie is the next on my short list of her amazing desserts. (And the list could go on - Slap-Ya-Mama Fudge Cookies, Good Ol' Raisin-Oatmeal Pie, Pretzel Pie, Keep-The-Hubby-At-Home Cake, Black Tie Strawberry Pie, Coconut-Pecan Sweet Potato Cheesecake, German Upside-Down Cake, and her World-Famous Chocolate Bacon Peanut Butter Pie.) Back to the apple pie. This pie is something of an ingenious creation. It's a pie, that's for sure. But it's also something a whole lot more. She takes your standard American apple pie and turns it on its head, literally. She starts by adding whole pecans, round side down, on the bottom of a deep pie dish, then up the sides. She spreads brown sugar all over the the pecans, then adds one of two pie crusts on top of that. Yep, she just sealed pecans and sugar into the bottom of a pie dish. She then adds all the apple filling and another pie crust on top, just like a standard apple pie. She bakes it all together, then flips it over. The inverted pie becomes a masterpiece of shiny, sticky, caramel-pecan goodness on top of an apple pie. Ingenious. And something I definitely want to try.

Upside-Down Apple-Pecan Pie

If I had to say one thing to her publisher and to all cookbook publishers everywhere, it would be, add more pictures, please! The pictures they did use are fantastic, but they are few and far between. I would love to see more images of what I might be making and this book has far too few for my taste. Nonetheless, this book has stolen my baking heart.

When I chose this book, I wasn't sure that I was going to keep it. I had thought I might send it down to my sister for her own redneck kitchen. However, I think she may be getting a copy from me via Amazon. This one is going on my shelf.

Happy eating!

*I received a copy of this book from Blogging for Books in exchange for my honest review. 

Thursday, November 20, 2014

Chunky Apple Snickerdoodle Bars - an gluten-free, dairy-free adaptation


Thank you, Pinterest. I am a big fan of Pinterest. Hours and hours of immersion into worlds of creation and positive challenges. I love it. How can you not? Unless, it sucks you in and you find you get nothing else done.

The lure of Pinterest.

However, in moderation, it can be a super fun experience - just as I had when I came across this amazing recipe for Chunky Apple Snickerdoodle Bars.

Let me tell the story:

I was on the hunt for something exciting and intriguing to make. A good friend and neighbor was hosting a Pictionary night filled with a homemade taco bar and cookie potluck. We were all told to bring our enthusiasm and some tasty cookies or bars for sampling - and for potential winning. My friend was going to dream up some wonderful prize and a few of the attendees would be selected to taste and choose a winning cookie.

Hmm. This is always a challenge.

See, my friend and most of her friends aren't gluten-free. I am. I knew I was going to bring something that I could eat, but I wanted others to enjoy it too and not be wary of the "gluten-free" cookie. I planned on making it dairy-free too, but that's a gingersnap with cookies. Vegan margarine or Spectrum shortening always do the trick. That's never been a issue. And I think my gluten-freedom has become fairly inspired and quite tasty, but not everyone is so willing to try something gluten-free - or once they learn it is, they begin looking for the differences.And she has kids. Kids are the hardest to please.

Oh, well, I thought! I am going to find something I like and the rest will be history. Her family has responded well to my gluten-free offerings in the past, but you just never know what everyone will like. So I decided to find something I wanted to eat and just dive in and do my best.

I started flipping through Pinterest one night and came across this recipe for Chunky Apple Snickerdoodle Bars. As I looked through the ingredient list, I realized I had everything I would need already in my tiny kitchen. So alright then! Cookie challenge accepted!

I got up early on the day of the game night, started baking and by mid-morning, my whole house smelled of apples, cinnamon, and delicious cookie yummy-ness. Mmm...they smelled so good.

As you will see, the recipe states that you let them cool in the pan - completely - or they will have a tendency to fall apart. With gluten-free baking, this is more than a good chance.

So I let them sit.

And sit.

And sit.

Oh, the waiting!

I scooped out a corner. I had to try them. Quality control. Yeah, that's it.

Mmm. They were so good. Soft, moist, dense, appley, cinnamony. Good.

Hurry up and cool!

It took a few hours and I could tell when I tried to pull them out early that the original creators of this recipe weren't kidding. Let. Them. Cool. These are a soft cookie with a tendency to fall apart. Just let them be. You'll be glad you did.

When I finally pulled them out, I cut them into tiny squares because I knew they were headed to a cookie sampling night, so I didn't want them to be too big. The small two-inch squares were perfect.

When I made them, I chose to use an apple called Elstar that I found at one of the orchards just north of Seattle. It's a sweet, small apple with an intense flavor burst! A few weeks prior, I had purchased a variety of the apples they offer (they produce a paltry 19 different varieties!) and had an apple tasting with some friends. It's amazing how different each apple variety is. Soft, sweet, tangy, tart, moist, dry. And that's just in one apple! (I'm kidding. But only kinda!)

I had two Elstar apples left that were best to be made into something baked, so a cookie recipe was perfect. I knew the apples would provide a ton of apple flavor and wouldn't get lost in all the cinnamon Snickerdoodle goodness. The Elstar is also a slightly meatier apple variety, so I thought they would work best at keeping the moisture level down. This was supposed to be a cookie, after all. I decided to dice them small and left the skin on for the extra texture and fiber (which by the way, seemed to melt right into the cookie).

The cookies turned out perfect. And I guess the judges agreed because my little apple cookies won the contest unanimously. On a funny little side note, there were five different cookies brought by various individuals and couples that night and four out of the five happened to be gluten-free! One was vegan and gluten-free, one had dairy, and the other was sort of an accidental gluten-free - it was a no-bake cookie that is naturally gluten-free. It was a surprise to all of us how many gluten-free cookies there were, but they were all delicious in different ways. It's such a treat to go to a gathering and find out that you are no longer in the food minority.

Enjoy this recipe adaptation! Happy eating!


Chunky Apple Snickerdoodle Bars - the gluten-free, dairy-free adaptation


Original recipe by Shelly of CookiesandCups.com

Makes 12 big squares or about 24 minis

Double recipe and bake in a 9x13 for more goodness and some to share! 

Ingredients:
  • 1/4 cup butter or dairy-free margarine, melted and cooled slightly
  • 1 cup light brown sugar
  • 1 egg, room temperature
  • 1 tsp vanilla
  • 1/2 tsp salt
  • 1 tsp baking powder
  • 1 cup gluten-free flour plus 1 tsp xanthan gum (I used 1/3 cup each millet flour, brown rice flour and cornstarch) 
  • 1 cup diced apples
  • 2 tbsp granulated sugar
  • 1-1/2 tsp ground cinnamon

Directions: 

1. Preheat oven to 350 degrees F. 
2. Line an 8x8 pan with foil and spray slightly with cooking spray. 
3. In a large bowl, combine melted butter and brown sugar with a wooden spoon. Once mixed, stir in egg and vanilla until smooth. In a separate small bowl, combine salt, baking powder and gluten-free flour, making sure no clumps are left. Add flour mixture to egg and sugar mixture. Stir until combined and dough forms. 
4. Stir in apples and spread in pan. 
5. Combine granulated sugar and cinnamon and sprinkle on top of batter. 
6. Bake for 25-30 minutes until edges are golden brown and center is set.
7. Allow to cool completely before cutting into squares. Can be stored in an airtight container for up to three days.  

Wednesday, August 6, 2014

Nutter Butters - the gluten-free, dairy-free version


For those of you who read my review of Treat Yourself: 70 Classic Snacks You Loved as a Kid (and Still Love Today) by Jennifer Steinhauer, we are going to keep this recipe short and sweet...peanutty sweet. If you haven't, you can read my review here.

This delectable book is where this peanutty-good recipe comes from. I reviewed the book and as with all cookbooks, the only proper way to truly review them is to start cooking - or baking, as it may be. I love Jennifer's book - the concept is awesome (who doesn't love a little sweetness in their life?), the treats are beautifully photographed (we all know that makes it better, no matter if they are real or not), and to make it that perfect book, the cookies - even made gluten- and dairy-free - were amazing!

A few notes on the baking of these beauties:

~ I used two pans lined with silicone baking mats and I used them a lot. My oven isn't convection, so I baked with one pan and filled the other. When the first was done, I took it out, placed the next one in and waited a few minutes to let the cookies cool. I then placed those on a baking rack and refilled the still-warm baking sheet. Normally, this is a major no-no in baking, but there was a lot of dough and a lot of cookies to bake. I had to keep the line moving. Somehow, it didn't seem to mess with the cookies much this time. Probably because they are a crunchy bunch.

One ready for baking, one just out of the oven. 

~ You can also put these guys closer together than two inches - they don't spread much at all, which is great. They hold their shape well and as we all know, making gluten-free cookies that require being cut out can be a challenge if the dough doesn't have the elasticity of gluten in it. They tend to break, fall apart, crumble, etc. These did great! They are rolled quite thin, so I used a fish spatula (very, very thin spatula) to transfer them to the baking sheets. I also prefer the scoop and drop method (scoop with the spatula, flip over the baking sheets and gently persuade them to drop onto the baking sheet by pushing through the slots in the spatula) for cookies like this so they don't get all bent out of shape. My first few, I tried to slide off the spatula. It worked okay, but I would recommend the less moving, the better. I wanted them to look like hearts, Picasso-versions of hearts.

~ I didn't find that I needed to flour the fork to prevent sticking when making the crosshatch. Use your best judgment. Maybe flouring the spatula would have been a good idea. Either way! Also, I was surprised at how far I could push the fork down, which seemed like they would go nearly through to the mat, and still have a cookie come out intact after baking. These guys are champs!

Just rolled, ready to rock. 

~ The recipes calls for a cooking time of 11-13 minutes. For my hearts, which I chose based on what I remember the size of a Nutter Butter to be, that would have been too long. Eleven minutes was a border-line deep brown and a minute longer, they would have burned. After the first batch baked for eleven minutes, I cut down the bake time to 10 - that was perfect. Use your judgment. If your medium-size cookies is the same size as my medium-size, aim for 9-11 minutes. If you have slightly bigger, aim for 11-13. If you are at high altitude, adjust accordingly, which is usually less, but that's a whole other can of worms.

~ See my note below about peanut butter choices, but whatever you choose, make sure it's at room temperature. All ingredients for this, and most baked goods, are best at room temperature.

~ About the filling: you may consider doubling the filling recipe. I've included the recipe in the book, but based on how many cookies I made, twice as much filling would have been better. Still good, but a thicker stuffing would have been more accurate to the memory of the Nutter Butter.

~ And lastly, I used a pastry knife to spread the filling onto the cookies. It was a very thick filling (which I thought was perfect and spot-on), but I wasn't sure how it would actually go through a pastry bag. This is what can happen with different peanut butters. Not a big deal. Still tasted awesome.

All teamed up, ready to spread. 

So, without much more ado, here is the recipe that makes my mouth water just thinking about it. Yum!

Happy baking!


Nutter Butters - the gluten-free, dairy-free version

A little nibble...

Adapted from Treat Yourself: 70 Classic Snacks You Loved as a Kid (and Still Love Today) by Jennifer Steinhauer

Hands-on time: 50 minutes
Total time: 5 hours, 15 minutes

Makes 22 sandwich cookies (according to the recipe - I got 44 sandwiches!)

*Note: I used a natural no-sugar peanut butter that I buy, then add some Spectrum shortening or Earth Balance to, along with a little bit of sugar, if I'm feeling like making it sweet. If it's not fine sugar, powdered, or liquid (ie. honey, etc.), the sugar crystals won't dissolve. I'm okay with this. You can also buy natural peanut butter that has everything in it, just like the classic Skippy or Jif without the hydrogenated fats. In fact, Skippy and Jif now make their own natural peanut butters in chunky or smooth. Use smooth for this recipe. 

For the cookie: 

1/2 cup (1 stick) salted butter or Earth Balance, softened
1/2 cup granulated sugar
1/2 cup (packed) light brown sugar
1/2 cup smooth peanut butter* at room temperature
2 large eggs, room temperature
1 tsp vanilla extract
2-1/2 cups gluten-free flour with 2 tsp xanthan gum (the recipe calls for bread flour, so I used 3/4 cup millet flour, 3/4 cup cornstarch, and 1 cup fine brown rice flour)
1/4 tsp baking soda
1/4 tsp baking powder
1/4 tsp salt

For the filling: 

1/2 cup smooth peanut butter, room temperature
1/4 cup (1/2 stick) salted butter or Earth Balance, softened
1 tsp vanilla extract
3/4 cup powdered sugar
1/4 tsp salt
Pastry knife, butter knife, or pastry bag

1. Make the cookie dough: In the bowl of a heavy-duty stand mixer, mix the butter, sugars, and peanut butter together on medium speed until just combined, about 30 seconds. Add eggs, one at a time, then add the vanilla, mixing just until incorporated.

2. In a separate bowl, whisk together the gluten-free flour(s), the xanthan gum, the baking soda, the baking powder, and the salt. With the mixer on low speed, slowly add the flour to the butter mixture in two or three batches, scraping down the sides and bottom of the bowl occasionally, mixing until the dry ingredients are incorporated well. (Mix any remaining pockets of dry ingredients in by hand, but let your mixer do it's job. This is gluten-free after all. You won't be messing with the potential gluten toughness here. You don't want to overdo it or underdo it). Shape the dough into a round and slide it out onto a piece of plastic wrap (I used a small glass bowl with a lid). Wrap the dough tightly, shaping it into a 1-inch disk, and refrigerate for 2 hours.

3.  Preheat the oven to 350 degrees F. Line two baking sheets with parchment paper or silicone baking mats.

4. Unwrap the dough and place it between two pieces of waxed paper or parchment paper. (I used natural parchment and it worked very well.) Roll the dough out to a thickness of slightly less than 1/4 inch.

5. Using a bikini-shaped cookie cutter (the top of the bikini to make a peanut shape) or any medium-sized cutter, cut out the cookies and place them 2 inches apart on the prepared baking sheets. Use the tines of a fork to gently score the top of each cookie in a crosshatch pattern. You should flour the fork first, or else the dough will stick to the fork and the cookies may well break. Bake for 11-13 minutes, or until the edges of the cookies just begin to brown. Let cool completely on wire racks. Repeat, if you have more dough.

6. Make the filling: Turn half the cookies upside down. In the bowl of a heavy-duty stand mixer, beat the 1/2 cup peanut butter and the 1/4 cup butter together on medium speed. With the mixer on low speed, add the vanilla, powdered sugar, and the salt, and mix until smooth. It will be thick. Scoop the filling into a disposable piping bag/pastry bag or use a butter/pastry knife for spreading.

7. Pipe the peanut butter mixture around the perimeter of the upturned cookies first, then fill in the outlined area, using about 1 tsp per cookie; you don't want the filling squishing out the sides. (You can use a butter knife or offset spatula instead to carefully spread it.) Top each frosted cookie with one of the plain cookies to make a sandwich. Store in an airtight container at room temperature for up to 3 days.

Book Review: Treat Yourself: 70 Classic Snacks You Loved as a Kid (and Still Love Today) by Jennifer Steinhauer


As part of Blogging for Books, my second book selection came in the mail about a week ago. Treat Yourself: 70 Classic Snacks You Loved as a Kid (and Still Love Today) by Jennifer Steinhauer is a fantastic collection of vintage desserts, snacks, and confectionables that most people have only been able to find in the grocery store in a little cardboard box. Think back to childhood in the 1950s, 60s, 70s, or 80s – what was more prized in your Care Bear lunchbox? A Ding Dong? Maybe a Ho-Ho. Or maybe some Nutter Butters, Raisinets, or a MoonPie? Or crunchy, cheesy, Cheez-Its? Any of the above were delicious, coveted, and easily traded, if you were truly willing to depart with it for somebody else’s lunchbox treasure.

As time has gone on and we have become adults, these confections are still coveted, by us and the children around us, but with the rising concern about health and the food we consume, many of us want to find a better alternative to the saturated, trans-fats, excess sugar and salt, and oftentimes, lower quality ingredients that most of these desserts and snacks are laden with. Enter Jennifer Steinhauer.  Her unique book filled with fun facts, baking tips that parallel America’s Test Kitchen-quality knowledge, and beautiful pictures is not only filled with 70 mouth-watering recipes, but the actual writing is quite delectable, as well.

Jennifer has been writing for twenty years at The New York Times (where else can you truly earn your chops?), as well as a weekly food column for Food52.com called Weeknights with Jenny (where she actually writes about chops). But this is only part of what makes her book so special. The food, the pictures, the writing, the ever-so-desired treats and snacks that we all love, but no one wants to eat without feeling guilty. Not anymore.

Now, I’m not a fan of eating with or without guilt. I say, eat what you want. Everything has its place, unless you are literally living on Twinkies. Your shelf-life may end up being as long as the Twinkie’s itself, as long as you’re preserved and full of cream. But there is an alternative…and Jennifer Steinhauer is releasing it to the world. Cupcake lunches, here we come!

Okay, enough sweet treat soapboxery. We all know that sweets in moderation might prove to be okay, as long as you balance them out with a long list of healthy other-things. And Jennifer is the first to point out in her introduction in Treat Yourself that some of the recipes have less calories/sugar, some have more. This isn’t about making these treats healthy by hiding fruits and veggies in them (unless the original did), but the book is all about deconstructing and reinventing the beloved classic snacks from Pinwheels to Ritz Crackers to the ever-loved-by-nearly-all-children popsicle. Now you can rest assured that life is good and so is your food when you bake a little sweet something right in your own kitchen. And in my kitchen, that means gluten-free and probably dairy-free.

So, here is where the true test begins – how are the recipes?

Jennifer’s recipes aren’t gluten-free, nor dairy-free. But over the years, I have mastered the art of gluten-free baking, for the most part. Yeast doughnuts are tricky. So are cinnamon rolls. But as I pawed through her new cookbook, I could tell most of these would easily translate to gluten-free (the trickiest part), and dairy-free has become pretty much a piece of cake. I had so many that I wanted to try (can you say, Chicken in a Biskit?!), but I chose something where I already had everything on-hand – Nutter Butters.

Oh, I used to love a Nutter Butter every now and again. The peanut-shaped cookies sandwiched with a soft, yet firm peanutty filling. Just like an Oreo, I’d peel the two cookies apart, lick or roll the peanut filling off the inside, then eat the two cookies separately or with milk. They were as much fun to eat as they were to taste. I haven’t had a Nutter Butter in years.

Until yesterday.

Now, here is how I can tell a cookbook is truly legit. If the gluten-free version is as good as the Nutter Butters were, the glutened version will be equally outstanding. The texture, the taste, the quality was just like eating a Nutter Butter right out of the package, gluten and all. I was truly amazed. I never really know how a recipe is going to turn out (although usually I can tell by the ingredient list ratio); most of the time, you just have to give it a try. The recipe will tell you what it’s worth. And this one is worth about a million bucks. Okay, maybe more like $19.99, or probably less on Amazon.

The cookies were crisp and peanutty, but not like a peanut butter cookie exactly. And I used a combination of gluten-free flours, xanthan gum, and natural peanut butter to boot. They reminded me exactly of a Nutter Butter. Even if I haven’t had one in a long time, the memories came flooding back. And who cares, anyway? These cookies were outstanding! I’d eat the cookie by itself.

But then, there’s the filling. A soft, peanutty, slightly salty flavor with just the right amount of rollability. Because that’s important. The one downside to this whole baking experiment: the recipe says it makes about 22 medium sandwich cookies (to which she used the top part of a bikini cookie cutter – I used a heart cutter) with enough filling to fill them. I made 44 medium-heart-shaped sandwich cookies. And no, it wasn’t 44 individual cookies, hence the 22 sandwiches – I had 44 sandwiches when I was done. Great! Some to share. This made not quite enough filling and it would have been an easy double, but I ran out of peanut butter. Not complaining. They were still freakin’ awesome! But double-filling is so good too. Just look at the Double-Stuf Oreo. Twice the trans-fatty goodness. Unless you make Jennifer Steinhauer’s.

Back to the Nutter Butter. These cookies were spot-on. The texture was great, the flavor was incredible, and I adore them. So far, no complaints from friends either – gluten-free or not. That’s how I can tell this is a great book. Gluten or no gluten, the cookies rock. I am excited to try a few more recipes. Maybe every single one.


Happy eating! 

Finished product with a little heart-y bite. 

Check out the Nutter Butter recipe here

*I received a copy of this book from Blogging for Books in exchange for my honest review. 

Monday, July 28, 2014

Product Review: Happy Dance Baking Company Blondie Brownies


Happy Dance Baking Company Blondie Brownie

While I was out and about today, I drove past the Lynnwood Farmer's Market (north of Seattle, folks) and made a quick turn to find myself a parking spot. Even though it was raining small kittens and puppies, I thought, What the hey! You just never know what you'll find at a farmer's market. Treasures lie around every corner.

And specifically at the corner of yum and delicious, I found this amazing little treasure. After perusing the standard farmer's market stands of kettle corn, beautiful flowers, and tantalizing produce, I came upon a couple of cool finds: Lynnwood Farmer's Market has a Harley stand (awesome!) and an allergen-free baker...Happy Dance Baking Company.

Happy Dance Baking Company was started by Jen Fosnot just a few years ago, but her journey into allergen-free eating started nearly a decade earlier. Jen's daughter was diagnosed with severe allergies to gluten, yeast, eggs, soy and dairy. She looked around for assistance, but back then, there weren't many products lining the shelves, certainly not like there is now, and she lived in the Midwest where they are just starting to catch up to understanding about allergy-free eating. A large portion of the country is gaining in this knowledge, but as all allergen-free eaters know, not a day, week, or month goes by when someone asks you what gluten is or why you don't eat dairy when they have lactose-free milk

Partially devoured...
Jen turned to her trusty kitchen and turned her whole family into allergy-free eaters, whether they liked it or not. It was a matter of safety for her daughter who had to carry an epi-pen in the event of exposure and often dealt with issues such as hives, as many food-allergic/sensitive people do. She refused to give in to stale, dry fare and eventually came up with some pretty incredible recipes.

Now, I have tried a lot of gluten-free, dairy-free, soy-free, egg-free, allergen-free foods in my lifetime. I've been eating allergen-free for nearly two decades. I, too, turned to my kitchen to get good food in the early years, although now, the shelves do stack better quality products when I need or want something in a pinch. Thank goodness that technology and the sheer number of bakers have more than quadrupled since my early allergy-free eating years. Not all of it's good, but Jen and the Happy Dance Baking Company knows what they are doing!

At her farmer's market stand, she had a plethora of baked goods including peanut butter-chocolate chip cookies (about the size of a softball), drizzled chocolate chip cookies (yum!), two kinds of brownies, a mini-muffin loaf, and several other varieties of cookie softballs. I say that lovingly. They were huge! Most of the price point ran from $3 to $7 - not bad considering she favors organic, all-natural ingredients, including coconut oil, several different gluten-free flours, organic chocolate, and organic sugar. It seems most of the ingredients are on the organic list, except those that would be hard to find (if at all) such as organic arrowroot.

I wanted to buy them all, but I settled for the nearly-all-organic blondie brownie bars - a four-pack for $7. If her other stuff is comparable to these blondies, I am in love. I've made blondies and I've bought them, but these were really outstanding. A nice crisp bite to the chocolate drizzle with a nice soft, moist and tender blondie underneath. Studded with chocolate chips and a nice soft texture, what more could you ask for? Not too sweet, not too gooey, just a nice soft, moist bite with a little chocolate snap. These were divine. I would highly recommend you tap dance your way to Happy Dance Baking Company today.


Sunday, November 3, 2013

SPIRAL APPLE BREAD WITH CARAMEL APPLE GLAZE


Lovingly adapted from InspiredbyCharm.com to make gluten-free, dairy-free and vegan. But all kinds of yummy.

Makes 1 loaf

Bread
2 cups all-purpose gluten-free flour with added gum (I used 2/3 cup EACH millet flour, brown rice flour, and cornstarch PLUS 2 tsp xanthan gum)
¾ cup warm milk of choice (I used coconut milk)
2 tbsp unsalted butter, vegan butter spread (like Earth Balance), or palm shortening, melted
2 tbsp sugar
1 ½ tsp instant yeast
½ tsp salt
¼ tsp ground cinnamon
2 apples, peeled, cored and sliced


Topping
¼ cup unsalted butter or vegan butter spread, melted (I used olive oil spray)
¼ tsp ground cinnamon
¼ cup sugar


Glaze
2 tbsp unsalted butter or vegan butter spread
¼ cup packed brown sugar
1 tbsp apple cider
½ cup powdered sugar, sifted


Place flour, sugar, salt, cinnamon and yeast in a stand mixer with the paddle attachment. Stir to combine ingredients.

In a small bowl, add melted butter/shortening into the warm milk. Then with mixer on low, add this mixture to the flour mixture until combined.

Mix on medium for about 4 minutes, then transfer dough into a lightly oiled bowl. Cover loosely with plastic wrap or a tea towel and let rise in a warm area for 45 minutes or until doubled in size-ish.

Lightly grease an 8- or  9-inch round pan. Starting at the center of the pan, place a dollop of dough, as big or as little as you want. Then put a few apple slices around the dollop. You can overlap them – I did. Take another apple slice and spread some dough on one side with a knife or spatula and place against one of the other apple slices already in the pan. You can make them a little offset from each other or perfectly symmetrical – your choice! Do this in whatever pattern you like. It’s fun! Keep doing this until you are close to the edge of the pan, making sure to leave about ½ cup of dough for the edge of the bread. Using the last of the dough, spread small amounts around the outer side of the apples that are closest to the edge of the pan and smooth with a spatula or knife or leave rustic, if you like that.

This is after the second rise and baking. Yum. The dough will fill in any gaps as it rises. 

Cover loosely with plastic wrap and let rise for 20 minutes. I like to warm my oven using the warm setting and then turn it off and place my dough in there for a final rise. If I do this, I just use a tea towel to cover it – no plastic in the oven. Both options work well, depending on where the dough is being proofed.

Toward the end of the rising time, preheat the oven to 350 degrees F, if the dough isn’t already in it. If the dough is proofing in there, then remove the pan at the end of the rising time, leaving the towel on top of it, and then preheat the oven to 350 degrees F.

Bake for 20-25 minutes, until golden brown-ish. (Gluten-free stuff doesn’t brown all that well, depending on what flours you are using. To get a more golden crust on your bread, you can try several things: egg wash, spray with olive oil or a bit of butter/vegan butter, or a vegan cream wash will all help the crust brown. But seriously, how brown do you need something to be? It will still taste delicious either way!)

For the topping: Mix cinnamon and sugar together in a small bowl or use a premade cinnamon-sugar mix. Once the bread is removed from the oven, brush loaf with melted butter or spray with olive oil and then sprinkle with the cinnamon-sugar mixture.
Let cool in the pan for about 10 minutes, then remove from pan and place on a cooling rack to finish.

While the bread cools, melt butter in a 1-quart saucepan over medium heat. Stir in ¼ cup brown sugar. Heat to boiling, stirring constantly; reduce heat to low. Boil and stir 2 minutes. Stir in cider. Heat to boiling; remove from heat. Cool to lukewarm, about 30 minutes.

Gradually stir powdered sugar into glaze mixture. If the glaze becomes too stiff, stir in additional cider, ½ tsp at a time. If the glaze is too thin, add more powdered sugar. Once the bread is completely cooled, drizzle glaze all over it, then eat. Yum.

The bread will last for about two minutes – it’s that good. But if you do have leftovers (really?!), then place those sad little bits in an airtight container until someone finishes them off, which will be in about two more minutes. If they last longer than that, you might be able to hold onto the leftovers for about 3 days, but as with all gluten-free yummies, the texture may change. Just reheat them for a little bit in a microwave or oven and they should be delicious once again. Or just eat it all that night. You choose. J


Wednesday, September 4, 2013

Product Review: Udi's Gluten-Free Tortillas


One of my favorite things is to peruse for new items while walking through great stores like Whole Foods. I love to try new things. I’ve found a whole treasure trove of fun adventures simply by walking slowly and looking around, instead of the more often used get-in-get-out, don’t-spend-$200 method.

Today, I took the slow route at Whole Foods. And it paid off. I found several new items, even if they were just new to me. One of them was something new by the infamous gluten-free Udi’s brand.

Udi’s sort of revolutionized the way gluten-free eaters eat. Before that, we had some decent products. Okay, most of them were cardboard and resembled Styrofoam. Alright, I’ll be fair. Not all of them. But when Udi’s brand hit the market with their blend of mostly tapioca starch products, gluten-free eaters could buy bread that would stay together in a sandwich and make great toast. They were even good just out of the bag.

My family is from Denver and I travel back there often. This is where I was introduced to Udi’s gluten-free bread. I happened to be in a Whole Foods (shocking!) in Boulder where my family was getting sandwiches to go. I dismissed it as an option (as most gluten-free eaters do, especially all those years ago when gluten-free eating was sparse unless we made things ourselves), but then I decided to ask the sandwich maker if they had gluten-free bread. They did! I was still skeptical, but I thought, oh, what the heck. I ordered my sandwich on the bread and hoped for the best. What I got was pretty unbelievable. I didn’t take any pictures, so you’ll have to take my word on this, but the bread slices were enormous! Bigger than even a traditional wheat loaf and soft, brown, and heavenly. The texture was astounding! I nearly passed out with glee and eagerly asked the sandwich maven where they got this bread. Did they sell it here? Where can I buy it? Can I have more please??

Well, that was my first introduction to Udi’s. When my family and I happened into an Udi’s café in Olde Towne Arvada, we found this delightful bread and many other fun gluten-free foods there, as well. What I learned later was that the bread they made for the stores like Whole Foods for their sandwich department and for the Udi’s cafes were made in special-made pans so they would be bigger than traditional bread, even of the wheat variety. And they were fresh daily, not frozen. That changes the texture quite a bit. Even so, Udi’s bread gave us an option that we didn’t have before – yummy gluten-free bread.

My intro to Udi’s and Udi’s cafe was many years ago and Mr. Udi (technically, it’s his first name, but that’s what I called him when I met him in one of his cafes) has since sold the commercial manufacturing aspect of his business to a large conglomerate that I have been assured is gluten-free dedicated. He has kept his cafes up and running, but the menus have changed a bit and you can’t buy as many gluten-free goodies in-store as you once could. But the food is still good, if you happen to be in the Denver area.

To round this story out a bit, here’s the interesting part: when I met Mr. Udi all those years ago, he mentioned that he was working on trying to figure out how to make a good gluten-free tortilla, but hadn’t perfected it yet. He was determined though, he said. But not until the product was Udi-worthy. It had to be great. And it seems he made good on that promise.

Back to the present day, as my jaw dropped over the newly-found Udi’s gluten-free tortillas, I hesitantly picked up the packaging, pretty sure they would be like most of the other gf tortillas – pliable, but rice-based and hence, prone to break, fall apart and be a bit dry. I don’t eat a lot of corn, otherwise, most g-free eaters I know simply eat corn tortillas. Always a good option, but for those of us who don’t eat corn or don’t like corn tortillas, our options are minimal.

Now, I will say, there is a decent gf tortilla on the market made by Sonoma that combines several flours, including rice, tapioca, teff, buckwheat, etc. I have tried the two they made and they’re pretty good, but as most of you know, if we have one sensitivity, we have many. I don’t often eat the Sonoma ones because there are a few ingredients that do not jive with my body. Other than Sonoma’s tortillas, I really haven’t found one that I liked very much, warm or right out of the packaging. The products are just…okay.

Pan back to Whole Foods: I actually saw two new varieties – Udi’s and Engine 2’s Brown Rice Tortillas. I manhandled the Engine 2 tortillas in the packaging and they seemed to me not that different than the Sonoma tortillas, or more like the more common Food for Life brown rice tortillas or even the Trader Joe’s brown rice tortillas. So setting those aside, I manhandled the Udi’s packaging trying to get a better look at what was inside. What I saw was a white tortilla (very much unlike the brown of the brown rice tortillas) that looked very familiar and very much like a traditional wheat tortilla.

Hmmm…this could be interesting. I dropped the $5.49 bag of 6 in my basket and went off the pay the piper.  

Well, I am like a kid at Christmas when I buy new things. I can’t wait to try it! Or play with it! Yes, I do play with my food. It’s a tortilla! It’s meant to be flat or rolled or curled around something. It’s kind of like playing, right?

I ripped open the bag and felt the texture, pulled it apart and took a bite. Mmm! The flavor was what stood out to me the most. It tasted like a tortilla should not – not chalky or bland or flavorless, which many of the gluten-free flours can impart, shall we say, interesting flavors. Not here! And it didn’t have that all-too-familiar rice flour extra chewiness. This white flatbread was delicious and flavorful!

The texture of the cold tortilla (Whole Foods stores them in the cold case near the sandwich counter…I’m seeing a pattern here!) was a cross between a corn tortilla – sans the corn – and a soft wheat tortilla. It was pliable and tender and only began to crack under pressure which I attribute to the lack of a filling and it being cold. Even a wheat tortilla will do this – from what I remember. I was amazed! A good texture is a tough thing to accomplish in the gluten-free world, especially if said gluten-free item has been refrigerated.

Amazed!

I got home and having not had my fill yet, I made an egg scramble to toss inside a warmed tortilla to see how it stacked up to the wheaty variety. Amazed! The texture was soft, pliable, and held together like it should’ve been a wheat tortilla. Made me kinda want to look at the packaging again, just to make sure. Yep. Still gluten-free. And amazing.

My final test was the last bits of the scramble and the mostly-gone tortilla shell – I took the tortilla and wrapped it around several times with the little bit of eggy goodness inside, just as you would a breakfast burrito. Amazed! It held together, everything stayed in place without cracking, crumbling or falling into the pits of gluten-free crumbly-ness. Amazing! It may have taken Mr. Udi many years to perfect the gluten-free tortilla, but it is pretty darn-near perfect. Delicious and amazing.

Now that I have gotten my tortilla-amazement on, I can happily dream of other adventures.

Happy eating! 

Tuesday, February 14, 2012

Perfect Pear Muffins with Sweet Whipped Cinnamon Butter

Breakfast really is for champions. It's the meal that starts the day, starts your body, starts your mood. So, why not make something that nourishes you and makes you feel good, inside and out?

The other morning I had a craving to bake something. My fridge was nearly empty save for some eggs and my variety of gluten-free flours. The freezer had a few items, but nothing breakfast-worthy. And I certainly wasn't in the mood to throw on some clothes just to run to the store while hungry. That's never smart.


So, I did what all hungry people do - I created something with what I had.

I scoured around until I realized I had a couple of cans of pears, plenty of gluten-free flour, the aforementioned eggs, and the basics to make what has become a new favorite - pear muffins.

These little nuggets of yummy muffin-ness teetered, as all muffins do, in the relatively unhealthy realm. I had to make them a little more nutritious if I was going to justify basically eating a modified cupcake for breakfast. Now, in all fairness, my muffin recipe contains half the amount of sugar of most cupcake recipes and I had a solution for the inevitable oil that's usually used heavy-handed: applesauce.

Applesauce as a substitute for oil is an old trick bakers have used to keep baked goods moist and delicious without all the extra added fat and calories. Now, mind you, I am not against fat or calories - we need them both. But, since I had been eating sweets (see Oreo Cupcakes - A Sweet Surprise) in the past week and my fridge truly was bare and devoid of better nutrition, I had to make sure these were actually going to be good for me, as well as delicious.

So, with the mix of protein-rich millet flour and fiber-heavy brown rice flour, alongside heart-healthy applesauce and some yummy pears (as well as edging out a few calories by using water instead of milk), I knew this would be a winning breakfast combo. A great way to start off my day!

And maybe my mid-afternoon too.

Happy eating!

Perfect Pear Muffins with Sweet Whipped Cinnamon Butter


Makes 12 muffins

3/4 cup millet flour
1/2 cup brown rice flour
3/4 cup cornstarch
1/3 cup sweet rice flour
1/2 cup granulated sugar
2-1/2 tsp baking powder
1-1/2 tsp xanthan gum or karaya gum
1 tsp salt
1 tsp nutmeg
1 cup water, room temperature (or lukewarm)
1/4 cup applesauce (all-natural with no added sugar)
2 large eggs, room temperature
1 tsp vanilla
1 can pear halves, drained and chopped into 1/4- to 1/2-inch pieces

1. Preheat oven to 400 degrees F. Line a 12-cup muffin tin with papers, silicone liners or cooking spray.

2. In a stand mixer, combine the millet flour, brown rice flour, cornstarch, sweet rice flour, sugar, baking powder, xanthan gum, salt, and nutmeg using the paddle attachment. Add water, applesauce, eggs, and vanilla. Mix on medium speed until thoroughly combined.

3. Remove bowl from mixer and add diced pears. Fold pears into batter with a spatula just until combined. Divide batter evenly among the muffin cups, each about two-thirds to three-quarters full. If you have extra batter, you can either make them into mini-muffins or save for another batch.

4. Bake for 18-20 minutes, or until the tops of the muffins are golden brown and a toothpick inserted into the center comes out with only a few crumbs on it (mostly clean). Remove from the oven and let cool in pan for 10 minutes, then remove to finish cooling on a wire rack. Serve immediately or store in an airtight container for up to 3 days.

Sweet Whipped Cinnamon Butter

1 cup butter, softened, or natural margarine of choice (I used half Soy-free Earth Balance and half Smart Balance Heart Right Light)
1/3 cup Marshmallow Fluff (I prefer the original brand due to its simple ingredients)
2 tsp powdered sugar
1 tsp ground cinnamon

1. In a stand mixer using the whisk attachment, cream the butter or margarine until soft, creamy and fluffy, about 2 minutes. Add the marshmallow fluff, the powdered sugar and the cinnamon. Whisk on low to combine, then switch to high to incorporate some air, 1-2 minutes. Serve with Perfect Pear Muffins and enjoy!


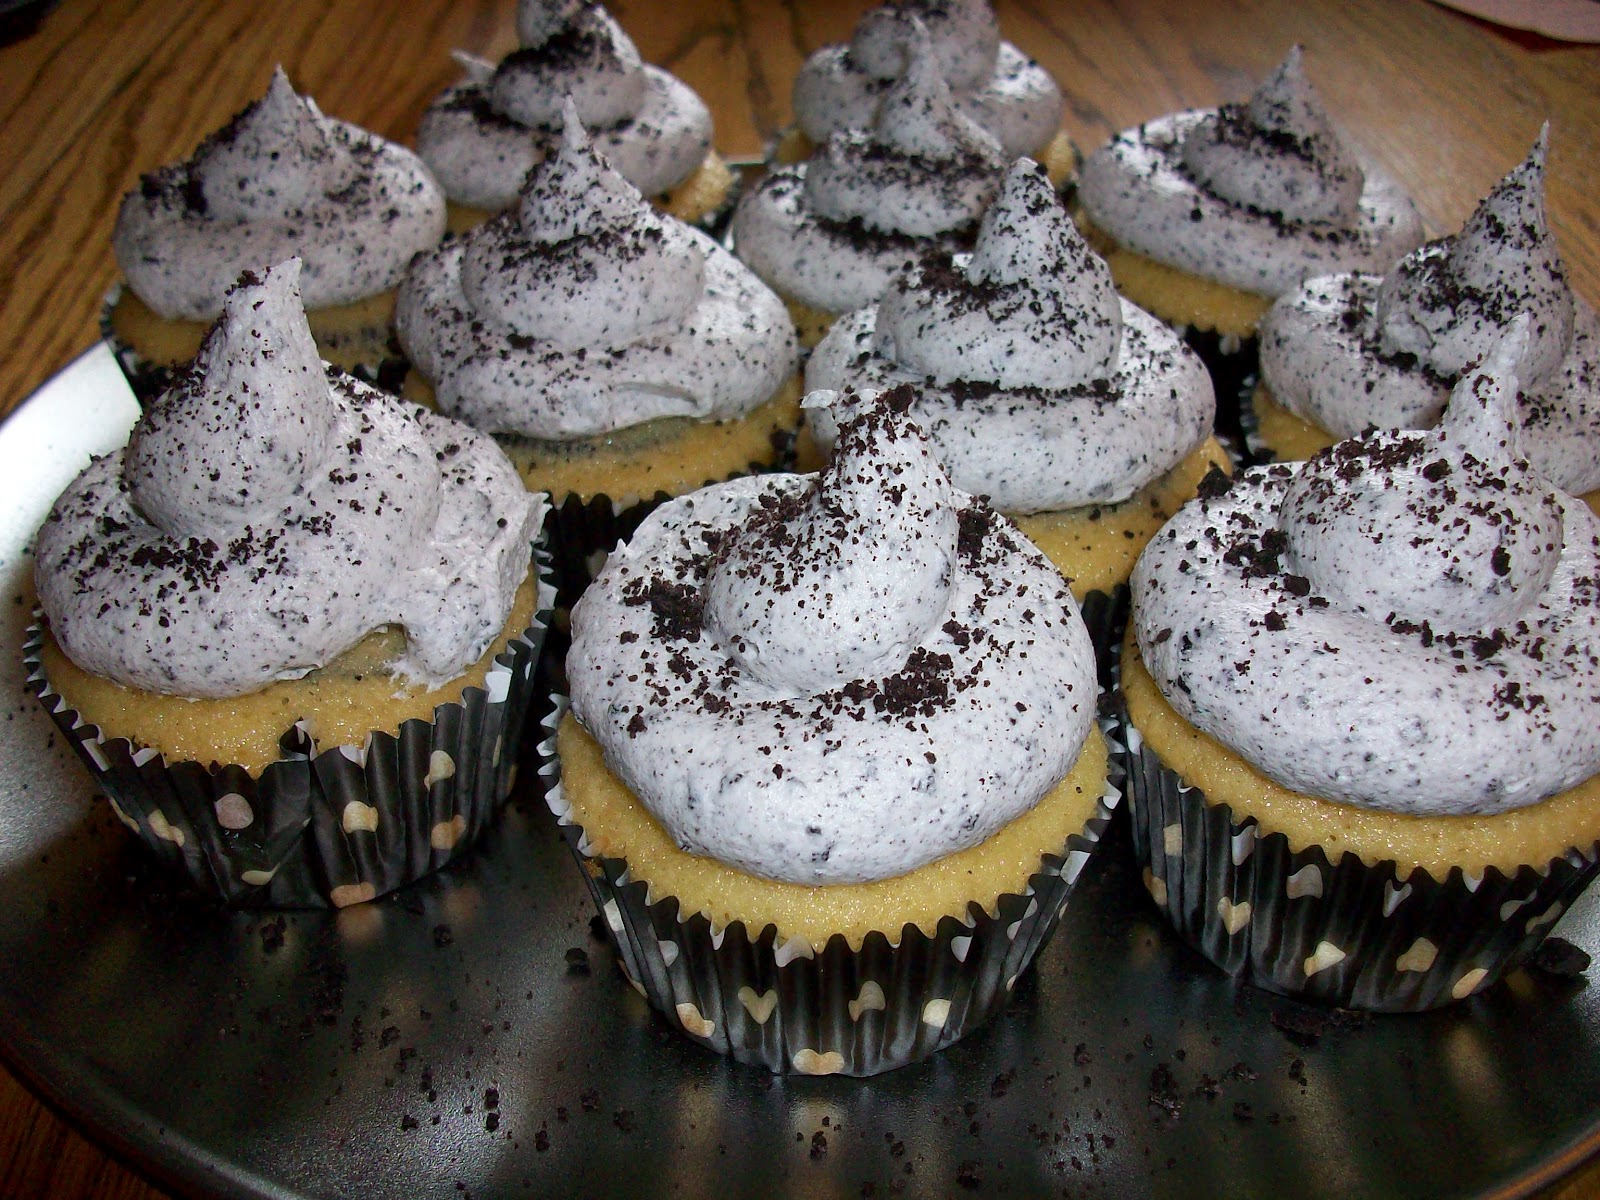
Oreo Cupcakes ~ A Sweet Surprise


A good friend of mine has a bit of an Oreo problem.

      She adores them.

And since I adore her, I had to make these delicious little treats for her as a birthday surprise. It took me awhile to settle on what flavor of cupcakes I was going to make for my friend because I didn't really know what her favorite kind of cake was. I knew she enjoyed sweet treats, but as most women are doing, she wanted to watch her consumption of delicious little things.

I have no such problem with that. The eating of delicious little treats, that is.

However, I know she does fancy a sweet thing on occasion and her go-to choice is almost always Oreos. A slathering of thick sweet frosting sandwiched between two little crunchy chocolate cookies. Dunk them in milk, twirl them apart, eat one at a time or pop one whole. Lots of different ways to enjoy them, right? And nowadays, they come in almost every flavor and variety. Peanut butter, vanilla, mint, ginger. Red, white, green, brown. Coated in chocolate, white, milk or dark. You name it. People love their Oreos.

I am an Oreo fan, but it is not my absolute favorite. And since I have gone gluten-free, I don't think I've had an Oreo or a knock-off version in years. But, since my friend loves them so much, I wanted to find a way to incorporate them in another favorite - the cupcake.

Now, this is not new, nor can I claim to have invented such a thing as the Oreo cupcake. But, in the gluten-free world, I didn't know if I could find a decent sandwich cookie that would rival the original enough to enamour my wheat-eating friend. Would the cookies pass the test? Or would they fall as flat as the famous chocolate wafer?

I searched at one of my local natural health food stores and came across only one brand: Kinnikinnick. The package looked like all the other wheat-filled cookie containers, but would they taste the same or even close? It's hard to say. Gluten-free products can sometimes be a gamble and as most of us know, no matter what we do, they just aren't exactly the same. They are good, but would they be good enough?

Yep. They were pretty darn delicious.

I even dunked them in some Rice Dream and they were mighty tasty! I was quite pleased and ready to get my cupcake on.

FYI: I have been told that Glutino also makes a chocolate sandwich cookie, but since I haven't ventured to seek them out, I can't tell you how those are or how they will work in the following recipe. But, I am a Glutino fan in general, so I doubt they'll be anything less than fabulous. 

So, I had found a suitable replacement for the original Oreo cookie and on top of all of it, not only was the cookie delicious, but it was much more natural than the Oreo brand. The filling consists of powdered sugar, palm shortening (in its original form, not the hydrogenated kind, partial or otherwise, that so many companies use), natural flavorings and salt.

Not bad.

The cookie itself is a gluten-free dream made by a company that really understands g-free needs. Not something I worry about with Kinnikinnick. It has a nice chocolate flavor with a slightly sandy, shortbready texture that melts in your mouth in just the right way. The texture is mildly different from a true Oreo, but since I was going to bake with them, I knew they would be just perfect.

But I didn't want to just do a vanilla or chocolate cupcake with an Oreo-type frosting - I wanted to do something that would add a little surprise. After all, this was for a birthday!

In several magazines and a few cookbooks, I had seen other home cooks and chefs put a whole Oreo or other type of cookie in the batter and bake it inside the cupcake. How fun would that be? To bite into a soft and moist cupcake only to find a whole cookie in there too? Oh, yeah. That would be yum.

I knew that once I had settled on my decision to make a set of Oreo birthday cupcakes for a person who is just as sweet as the cake, that I had found the right combination to suit a happy situation. It was going to be a very happy birthday surprise.


Oreo Cupcakes


 Makes 12 regular cupcakes

(Cake recipe is adapted from Carol Fenster’s Cooking Free)

For all white cupcakes, use 3 egg whites rather than 2 whole eggs.

Make sure all ingredients are room temperature. 

Cupcake batter: 

1/3 cup butter, or ¼ cup oil or applesauce
1 cup granulated sugar
2 large eggs or 3 egg whites
1 ½ cups GF Flour Blend: (½ cup millet or white rice flour, ½ cup brown rice flour, ½ cup cornstarch or tapioca starch)
1 tsp xanthan gum or karaya gum (also known as GumTex)
½ tsp baking powder
½ tsp baking soda
¼ tsp salt
¾ cup buttermilk, or 2 tsp vinegar or lemon juice and enough nondairy milk to equal ¾ cup
1 tsp vanilla extract
12 whole chocolate sandwich cookies

Chocolate Sandwich Cookie Frosting: 

6 chocolate sandwich cookies, crushed into small pieces
1 cup palm shortening
2 cups Marshmallow Fluff (I prefer the original brand - Marshmallow Fluff - because it has four ingredients and they are natural) - can use up to 1 cup more depending on how soft you want your frosting
1 tsp vanilla 
2 tbsp powdered sugar (add more or less for preferred consistency and texture)
cold water, as needed 


1. For cupcakes: Preheat oven to 350 degrees F. Line a 12-cup cupcake pan with cupcake liners.

2. Using an electric mixer, cream butter (or oil or applesauce) and sugar on medium speed until thoroughly blended. Mix in eggs on low speed until blended.

3. In a medium bowl, sift together flours, xanthan gum, baking powder, baking soda, and salt. In another medium bowl, combine buttermilk and vanilla.

4. On low speed, beat dry ingredients into butter mixture, alternating with buttermilk, beginning and ending with dry ingredients. Mix just until combined. Batter will be very loose, if using oil or applesauce. Spoon 1 tbsp of batter equally into prepared pans, then place one chocolate sandwich cookie on top of each partially filled cup. Add another 1 - 1½  tbsp of batter over the top of the cookie. Let batter sit for 10 minutes.

5. Bake cupcakes for 18-20 minutes, until cakes are golden brown and a toothpick inserted into the side (so as to avoid the cookie) comes out clean. Allow cakes to cool in pan for 5-10 minutes, then remove from pans and allow to cool completely. 

6. For frosting: Place cookies in a small baggie and seal. Roll a rolling pin over the cookies or smash with the back of a heavy spoon until cookies are in small pieces. 

7. Cream the shortening in the mixer until smooth and creamy using the whisk attachment. Add fluff, vanilla and powdered sugar and mix on med-low until combined. Add water 1 tsp at a time until you get the desired consistency. If you add too much water, add more shortening and whisk on high until incorporated.

8. Switch machine to high to really get the frosting whipped, smooth and fluffy, about 2 minutes.  Remove from machine and fold in crushed cookies, reserving about 1 tsp. 

9. Pipe or spread frosting on cooled cupcakes and sprinkle reserved cookie crumbs on top of each cookie. 

10. Enjoy or surprise a friend! Keep cupcakes in an airtight container for up to 3 days, if not using right away. 

Monday, June 28, 2010

Ellie Krieger's Honey Oatmeal-Raisin Cookies: The Gluten-Free Adaptation


I love Food Network. What home cook doesn't? They have inspiring chefs and cooks, great recipes and easy things to bring more beauty and bounty into your home! How great is that?
Well, I love Food Network enough that I also felt the desire to subscribe to their monthly (mostly) magazine. And as soon as it shows up on my doorstep, I read the entire thing, cover to cover. I love it almost as much as I love my allergen-friendly mag, Living Without!

*Gasp*

I can't help myself. I love it! The layout, the pages, the recipes, the chefs. It's a great magazine. It's like the People magazine of the food world without all the drama. And the chefs may be the celebrities, but the food is definitely the star.

And I keep them all. I have a special little area on one of my shelves for Food Network Magazine, Living Without and a few others that are great for reference. That's how much I enjoy them.

Now, mind you, I do read them cover to cover, each and every page, but somehow - somehow - I missed Ellie Krieger's recipe for Honey Oatmeal-Raisin cookies the first time around. I'm sure I saw it, but at the time, I wasn't intrigued or inspired enough to try and adapt them. Don't know why. Just wasn't. What can I say? Sometimes you feel like baking, sometimes you don't!

In the most recent edition, I came across a little article section where readers can ask Food Network editors about features in the magazine. (See, I told you I read everything!) One reader asked about Ellie's oatmeal cookie recipe and about something called 'almond butter.' The reader didn't know what it was or where to get it. She'd never heard of it!

Shocking!

Well, to me anyway. I use the stuff every week; sometimes, every day. I love it! My body's not a big fan of peanut butter, but almond butter is right up my alley. So, that is my nut butter spread of choice and thank goodness, Costco carries it cheap and natural. Also up my alley.

Well, thanks to this reader's curiosity about almond butter, I have found a new favorite recipe. I went back and referenced (see, this is why I keep them all) the May 2010 edition and found Ellie's recipe. I scoured over the pages to see if I would be able to adapt it and after reading it through and feeling pretty confident, I gave it a shot.

And boy, did I do some straight-shootin'!

The cookies are tender and moist, just the right size with just the right amount of sweetness. I feel good because my body is enjoying them, they have a lovely flavor and they're packed with nutrition. All pluses!

So, here is my rendition of Ellie Krieger's now-famous Honey Oatmeal-Raisin Cookies. What I changed to suit my baking needs is in bold-type. There are a couple of gluten-free baking notes along the way, as well, so take note!

Happy eating!

Michelle

Honey Oatmeal-Raisin Cookies


Adapted from Food Network Magazine, May 2010, original recipe by Ellie Krieger
Prep Time: 25 min
Cook Time: 15 min

Level: Easy

Serves: 30 small cookies or 20 medium cookies (if using small ice cream scooper)
Important note: When baking gluten-free, it is best if all items are room temperature, unless noted otherwise, including the eggs and flours.
 
Ingredients


• Cooking spray or parchment paper/liners

• 2 tablespoons unsalted butter, melted

• 1/4 cup canola oil or grapeseed oil

• 1/2 cup honey or agave nectar

• 1 large egg

• 1/4 cup smooth unsalted almond butter

• 1/2 teaspoon vanilla extract

• 1/4 cup nonfat dry milk or almond flour

• 1 cup whole-wheat pastry flour (or 1/2 cup each all-purpose and whole-wheat flour) or 1 cup millet flour with 2 tsp karaya gum/xanthan gum/guar gum

• 1/2 teaspoon baking soda

• 1/2 teaspoon ground cinnamon or ¼ tsp ground nutmeg + ¼ tsp ground ginger + smidge each cardamom and cloves

• 1/4 teaspoon salt

• 1 3/4 cups rolled oats or combination of gf rolled oats and raw millet*

• 1/2 cup raisins (optional)

 
Directions


Preheat the oven to 350 degrees F. Mist 2 baking sheets with cooking spray or use parchment liners or paper. Beat the butter, oil, honey/agave, egg, almond butter and vanilla extract in a large bowl with a mixer until combined.

In another bowl, whisk the dry milk/almond flour, flour and gum, baking soda, spices and salt. Add the flour mixture to the butter mixture and stir to combine. Stir in the oats/millet and raisins.

Scoop tablespoonfuls of batter about 2 inches apart onto the prepared baking sheets. Use a small ice cream scoop with finger trigger for easy placement. Note: If you want the gluten-free cookies to be flat, press cookies down with your hand or roll them in your hand and flatten them before placing on cookie sheet. Otherwise, they will be round, but still delicious.

Bake until golden, about 10-12 minutes. Let the cookies cool 2 minutes on the baking sheets, then transfer to a rack to cool completely. Store in a loosely covered container for up to 3 days.

* I used raw millet in my cookies because I like the crunch and texture. You can omit these and just use gluten-free oats. Plus, I was out of raisins, chocolate chips, craisins, or any other yummy that would have been great in these.
 
Thanks, Ellie! You rock!!!